Thursday, December 17, 2015

What's on my needles (week 94)

This week I want to share a little trick.  

I am always happy when I figure out how to eliminate a step and not only get a project done faster, but also looking better.  For example doing a three-needle-bind-off instead of binding off two pieces and then seaming them.
In this three minute video I show you how, when it came to binding off a second layer to my button band, I used Elizabeth Zimmerman's sewn bind off while at the same time seaming it to the inside of the cardigan.
Try it in your next project  :)


 And as always:  HAPPY KNITTING !

Thursday, December 10, 2015

What's on my needles (week 93)

Featured finished project of this week is my latest store sample:

Baby Sophisticate by Linden Down

This is a seamless raglan constructed cardigan with a shawl collar. 
 
This pattern is free on ravelry for sizes 0-3 months and 6-12 months.  
There is a paid version for sizes up to child size 10 for $6.50.
Here is a link to the free pattern on ravelry: Baby Sophisticate free 
And the paid version (also on ravelry): Baby and Child Sophisticate

I used a heavy worsted weight yarn from Maine :  Peace Fleece Pyho Mnpa 75/25.
This is a 75% Merino, 25% Mohair blend yarn and comes in many lovely colors. I like it especially for an outer garment such as this baby jacket.  You only need one skein for size 6 months to 1 year.
The yarn comes in many beautiful colors and is a steal at $13 per 200yard skein.  I used the color "Blueberry Borsht". 


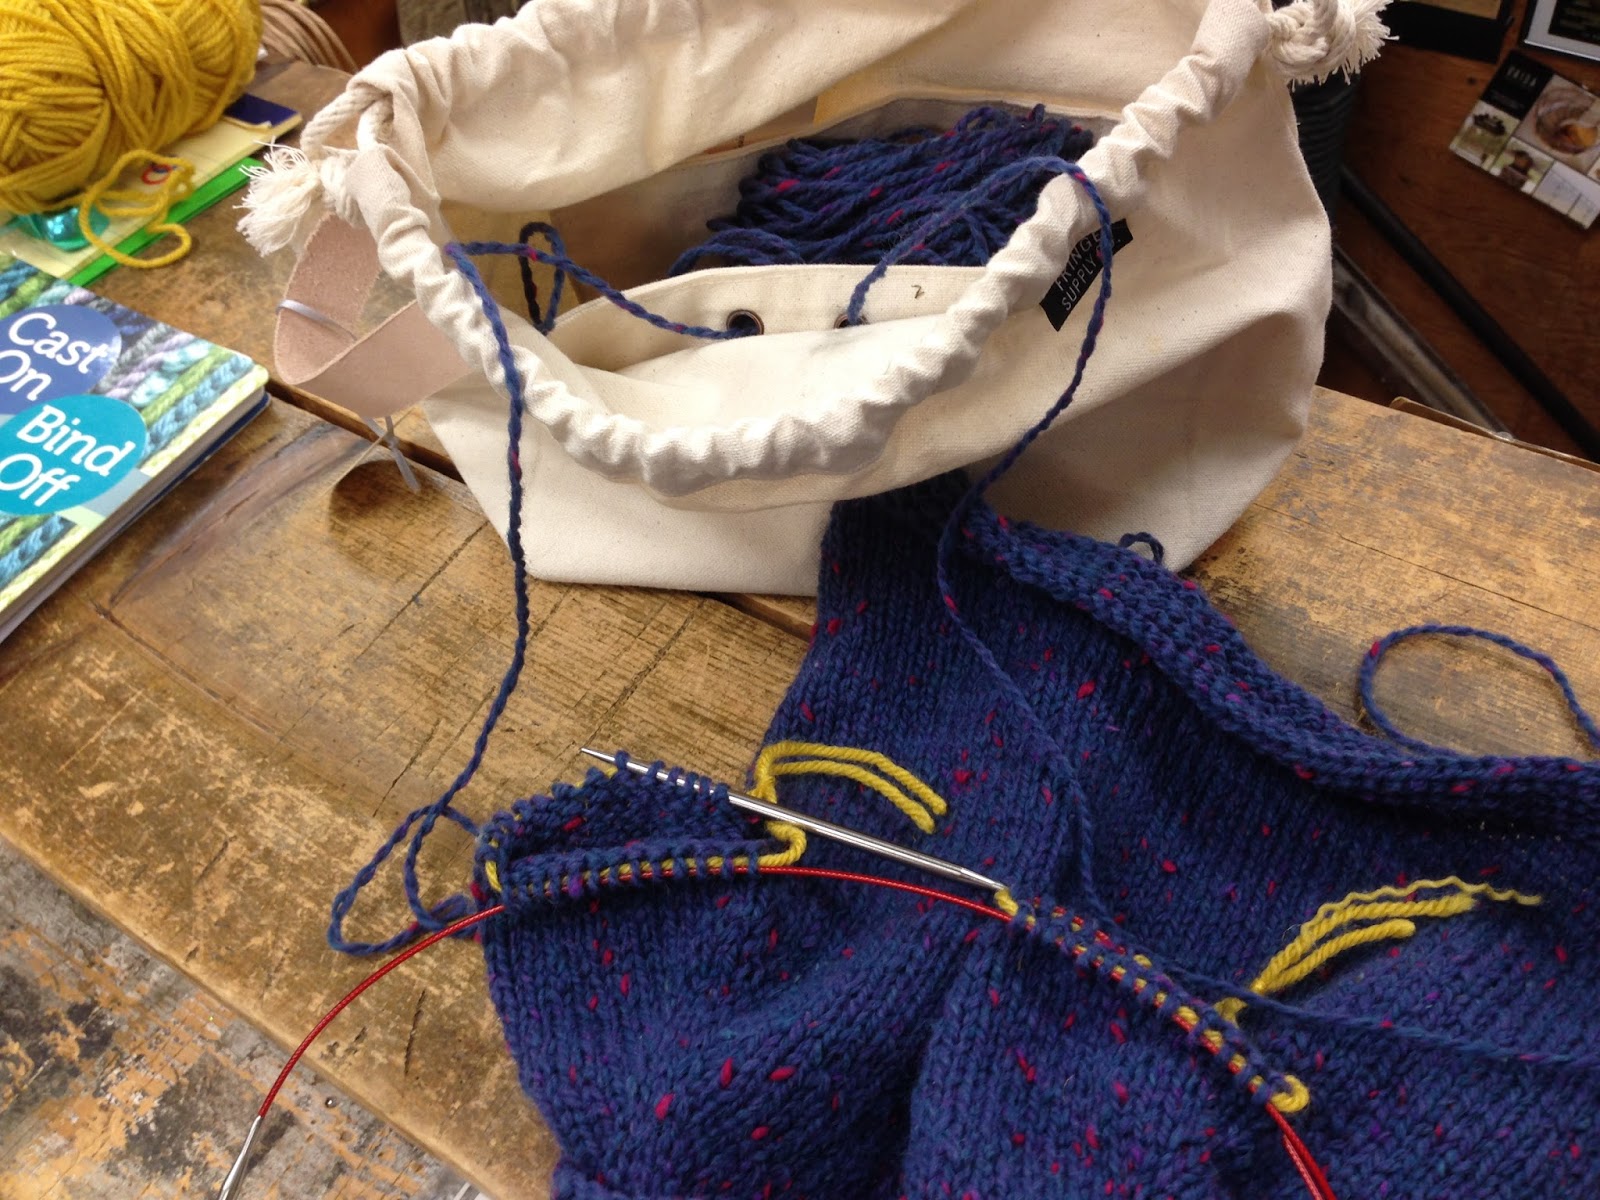
While knitting this baby jacket, I used one of the beautiful Fringe Bags we sell at the shop. It is constructed in a heavy canvass and has several inside pockets for your notions.  It also has a total of three grommets inside to feed your yarn through.  This is great especially for color work or two-at-a- time work.  I did knit up the sleeves both at the same time pulling yarn from the outside and the inside of the ball as I was not sure if I had enough yarn (I did have enough).  It is like having a mobile yarn bowl and yes, you can make up containers with holes in the lid or a binder clip to pull the yarn through to avoid tangled messes, but nothing beats the real thing; trust me on that!  The bag is the perfect size and closes with a draw string.  It has an additional leather strap handle on the side for easy carrying or to hang it up while knitting. 
At $63 each it is something you may want to put on your wish list.  It is the perfect gift for any knitter. 
 
I fed scrap yarn through the sleeve stitches in the row before I had to join the body..

..this made it easy to just "drop" the underarm stitches and join the body in the following row.
I picked up the sleeve stitches onto two circular needles to knit them at the same time

To bind off the collar I used Elizabeth Zimmerman's Easy Sewn Bind-off for the just right and stretchy fit.


Thursday, December 3, 2015

What's on my needles (week 92)

Gift idea #?

I have been "mass-producing" these wash cloths.  This is an easy and easy to remember pattern which is free on ravelry, but I am writing it out here for you, too.
Paired with a nice bar of soap, it makes the perfect easy yet personal gift for teachers, friends etc (don't forget to make a few for yourself.
I have been using "Lily Sugar'n Cream" as well as some left-over Pisgah Peaches and Cream (it feels good to use up some stash!!!) and Knit One, Crochet Too Ty-Dy Cotton (again from stash, left from a summer top) on US# 8 needles and some solid white wash cloths in Cascade Yarns UltraPima Cotton on US#6.
The washcloth is knitted flat with short rows and then seamed together.
Here are some pictures of wash cloths finished in various stages:


 And this is the pattern:

The Almost Lost Washcloth  pattern by Julie Tarsha 


Cast on 14 stitches
Row 1: knit to the end (14 sts)
Row 2: k 4, YO, knit to two stst before the end, turn
Row 3: knit all 13 sts
Row 4: k 4, YO, knit to two sts before the previous "gap"(four sts remain on the left needle) turn.
Row 5: knit to the end of row (12 sts)
Row 6: k 4, YO, knit to two sts before previous "gap" (six sts remain on the left needle), turn.
Row 7: knit to the end of row (11 sts)
Row 8: k4, YO, knit to two sts before previous "gap" (eight sts remein on the left needle), turn.
Row 9: knit to the end of the row (10 sts)
Row 10: BO four sts, knit to the end of the row.  You should have 14 sts on your needle.

Repeat rows 1 to 10 fourteen times.  You will have fourteen points.  Bind off loosely and seam the edges together using the mattress stitch.  Use a running stitch to run  along the edge of the middle circle and pull tight.  Weave in all ends and voilà, you are done!

 And check out AL Stickle's Variety store in Rhinebeck for some special soaps.


Wednesday, November 25, 2015

What's on my needles (week 91)

                   Happy Thanksgiving, everyone! 


Best wishes for a happy and healthy Thanksgiving Day with your families and loved ones <3
Even with everything which is going on in the world, there is so much to be thankful for ...

I hope that you will have some time to knit.  Here is my finished featured project of the week: 

Elementary Watson Socks;  for the free pattern on ravelry by Sherry Menton click here:  http://www.ravelry.com/patterns/library/elementary-watson-socks
These socks are knitted toe-up with a Fleegler Heel construction. 

I knitted them two-at-the time.  First I wound up one skein of the beautiful Anzula Squishy in the color "toffee" (don't you love it when the colors have such yummy names?!) Then I divided the skein into two with the help of my trusty digital scale.

Before I started 
  • I thought that I may want to mirror the cables, but did not because later when the leg has cables all around it looks better to have them all go one direction.  
  • I decided to use knitpurlhunters method of doing cables without a cable needle. 
Here is my own video working on the socks without a cable needle:


Ready, set go:
I used re-inforcing yarn in the toes (and later for the heels).  Working the beginning few rows was a little tricky; doing Judy's magic cast-on double stranded twice...but soon enough the toes had grown to a more manageable size:

Next I had to figure out when to start on the gussets.  To stay in the pattern one had to do it after completing a pattern repeat.  Each pattern repeat is about 1" in length and approximately 4" before the heel turn.  I took the designer's advise and put in a lifeline in case I needed more or less length for the foot.


Then I continued with just one sock; no use having to unravel two of them if I needed to.


After completing the gussets and heel, it was time for Tony to try them on.  I refer to this as Tony's "Cinderella Moment".

I was SOOO happy that it fit!!!  Now it was just a matter of having the other sock catch up in length and they could get re-united again to be worked at the same time for the remaining knitting (namely the leg).


I had just enough yarn to do five pattern repeats around the leg and then start the ribbing.
I modified the ribbing slightly by switching the stitches in the row below (basically cabling) so I always had a purl on top of a purl... 


I used Jenny's stretchy bind off and voila, another pair of socks finished.
This is how much yarn I had left!
 
348 cables and done!

Friday, November 20, 2015

What's on my needles (week 90)

With the Holidays approaching I decided to change my posts a little.  

With less to read you will have more time to knit. 

Each week I will talk about ONE project I am working on or (preferably) recently finished.  

I will talk about the pattern and yarn I used (likes/ dislikes on both) and especially let you know about new techniques I used :)  Some of these will be quick projects you may get inspired to cast on as your next gift :)


Today's featured finished project is the "Koolhaas" by Jared Flood (click for the pattern on ravelry)

This all starts at Stickles again.  
I found a beautiful Shibui Merino Alpaca yarn (heavy worsted) and knew right away that this would be perfect for a hat for someone on my gift list (pssst, I can't tell you who).  
Both the quality of the yarn and the COLOR had this person's name all over it ;)

Step 1:  I went on ravelry and put in the name of the yarn.  It turned out that it had been used in 895 projects on ravelry alone.  BTW, this yarn is discontinued, but if you like this pattern, you can use any yarn which gives you the same gauge. Of course you can also come to Stickles and get what we have left (there are two more colors: blue and golden-brown)


I narrowed down the projects by putting in "hat" as a keyword where it says "search inside projects"and came up with nine pages of projets.  As I scrolled through those I kept an eye out for projects which used just one skein.  When I came across thraceknits' Koolhaas I knew I found what I was looking for!!!


Step 2:  I purchased the pattern (I had already bought the yarn) and looked more deeply into how thraceknit knitted up this hat.  It turned out that she started with a tubular cast-on.  You may remember that I quite recently have fallen in love with the tubular bind-off.  One thing I don't like about the regular tubular cast-on is that you start with a provisional cast on and have to do a number of rather complicated steps, but when talking with thraceknit on ravelry she told me about Ysolda Teague's long tail cast-on which does not use waste yarn.

Step 3:  Now this may be repetitive for those who read last week's blog, but I learned Ysolda's Long Tail Cast on.  It took some trying out to get it right, but was well worth it.  I definitely like it better than the regular tubular cast on.  Here is a you tube video:


Step 4:  And so I started knitting.  I like the clear lines in the design.  Here is the story behind the design ( I am quoting Jared Flood):
The Story Behind the Design: The hat takes its name from Rem Koolhaas, a Dutch Architect/Urbanist whose work I admire very much. Last winter when I was home in Washington, I spent an afternoon in the Seattle Central Library, one of my favorite places in Seattle and an incredibly inspiring space. The architecture there created a design impulse and the hat was born in the following days. The design process kind of explains itself when you view the space (photo below)


     And I finished it (in under two weeks).  It looks even better "in person", but here are some pictures:

To show off the pattern, I put the hat over the corner of a pillow

The color is actually more green than in the picture


Thursday, November 12, 2015

What's on my needles (week 89)

"Elementary, Dear Watson" socks 

Click on the link; this is a FREE pattern on ravelry.
Since I used the Fish Lips Kiss Heel construction in the last few pairs of socks for Tony, I was not sure at all about the length of the foot before starting gussets and knitting the heel.  I followed the designers advise and put in a lifeline before starting the gussets. This is a Fleegler Heel construction and the gussets should start about 4" from the heel; these socks are knitted toe-up.
So, for a while I was anxiously working on just one sock and waiting to do a fitting.
Tony had his "Cinderella Moment" and, wonder of wonders, the sock FIT!!!  I brought the other sock up to the same point and they are now happily re-united again :)  Now it is just a simple matter of knitting the leg (about five pattern repeats and ribbing).  I am planning to bind off using the tubular bind off.


Tony's Cinderella Moment

Reunited again and it feels so good!

 I learned something new this week!

 I started making a couple of gift.  One of them is a hat ("Koolhaas" pattern by Jared Flood).
Since I like the tubular bind off so much and because I saw one knitter on ravelry start her hat with this cast-on, I cast on using the tubular cast-on method.  There are several ways to do this, but I really like Ysolda Teague's method which does not require a provisional cast-on.  It took me a while and two attempts to get this done nicely, but I am really liking it and happy to have learned something new.  Here are two video links to see how it is done, but as always I am here to help you learn this, too.
http://ysolda.com/tutorial/tubular-cast-on/ 
And on youtube:
Here are some pictures of my end-result so far:  
Long-tail tubular cast-on


One pattern repeat completed

Something quick and easy

It is fun to do something quick and easy. This washcloth pattern knitted flat and then seamed fit the bill:
The almost lost washcloth 
Click on the link; this is a FREE pattern on ravelry!
I am planning to make a few of these. They will make such good gifts partnered with one of the special soaps you can buy at Stickles!


A sweet gift


Thursday, November 5, 2015

What's on my needles (week 88)

At The Knitting Garage

The door handle cover I had made last January has disappeared :( and I made a new one.  I stayed in the same color scheme as those are the Rhinebeck School colors.

I made this one last January yarn bombing
This is the new one; take two


Last Monday being the first Monday of the month and as you can see on the sign on the door ...
We had Knit Night from 6-8pm.


Two of the ladies who came were working on the beautiful Block Island Gansey Hat, but were struggling with the chart.  By the end of the evening they were quite happy and knew how to proceed :)
Everybody brought their projects and got help as needed, ohh'ed and ahh'ed over our new and not so new inventory and had all in all a good time.

At Home

I did not get much further with my Tullamore cardigan, just two repeats on the sleeves.


Most of my efforts were spent to get Tony's socks going.  Elementary Watson Socks
I am doing the cables without a cable needle.  I found a great video by knitpurlhunter on "how to Cable without a Cable Needle". (click on the link to view)
I was working them toe-up and 2-at-the-same-time on two circular needles until I got to the crucial point of deciding if they are long enough.  I followed the designers advice to put in a life-line before starting the gussets.  The gussets are supposed to be started at 4" (un-stretched) from the heel and after one full pattern repeat.  I think I am at the right point, but better safe than sorry.  At this point I separated my socks and am working on one sock only as there is no need to have to unravel two of them if I need them to be longer.  On the up-side, it should go twice as fast now working on just one sock and I should know if I need to re-do the gussets fairly soon.
Just working on one sock now; I put in a life-line


Continuing in pattern on needle one
started on the gussets on needle two